For any WordPress website, its speed plays a very important role. If your site loads slow, then obviously it is a drawback for your website. The number of visitors will be reduced, SEO ranking will drop, and the users have to spend a long time waiting for the page to load. In order to boost up your WordPress website, caching is one method where you can increase your loading speed and performance of your website. The concept of caching is that it will store the dynamically generated data in a static format. So each time when you want the same information, you can retrieve the data without any further delay. There are tons of caching plugins used on WordPress website. But among them, W3 Total Cache is the best. W3 Total Cache settings will be quite difficult for the beginners.
W3 Total Cache is one of the most powerful and commonly used cache plugin in today’s environment. This plugin gives the best result compared to all other cache plugins. Based on the performance and loading speed we can decide a good website. Only if your website performs well you will have more visitors to your website. This caching plugin does that job for me. Its role is to give you a best performance and loading speed for your WordPress website. When there are huge visitors to your site, there will be a server load and database takes much time to deliver the data, and there will be a heavy traffic too. But whereas when W3 cache plugin is involved, it displays the result fastly and doesn’t have to call the database every time and the server. This cache works well in Shared hosting, VPS, and dedicated server. The main feature of this cache plugin is you will be able to do page cache, database cache, browser cache, object cache etc. So when your website needs more page views with good user experience and SEO ranking, it’s good if you opt for W3 Total cache plugin. Benefits of this plugins include:
- Your websites SEO ranking will be improved
- The performance of server will be improved
- The user will experience a good feel entering into your website, due to its fast loading and interacts with them quickly
Below are how to install and configure W3 Total Cache plugin on your WordPress website. This plugin is user-friendly and it is free of cost.
Note: Before installing W3 Total cache plugin on your website, you can check your website speed by using the tools Pingdom, PageSpeed Insight and GTmetrix. You can check the websites speed before and after installing this plugin.
Installing W3 Total Cache plugin
In order to install W3 Total Cache plugin on your WordPress, follow these steps:
- Enter into your WordPress dashboard
- In the left side navigation, you will see plugins and click on to it
- Then there is an option Add New just click on to it and search for “W3 Total cache” in the search box
- Once the plugin is found, click on install now button and activate the plugin
Now W3 Total cache is activated on your blog. But one thing to be noted is, before installing W3 Total cache make sure that all other cache plugins are uninstalled. Once you install this plugin, you have to configure it to enable its features to work on your website.
Configure W3 Total Cache Settings
Initially for the beginners, configuring W3 cache will be quite tricky to understand. So here we will explain to you how to configure W3 Total Cache.
Dashboard
In the dashboard, compatibility check is used to check whether the current version of server software is suitable for W3 Total Cache. Empty all caches is used to empty your previously cached data, in order if you install any new plugins or themes.

General settings
Now you can move to the general settings page by clicking the performance menu tab in your WordPress admin panel. Here you can configure the basic W3 Total cache settings.
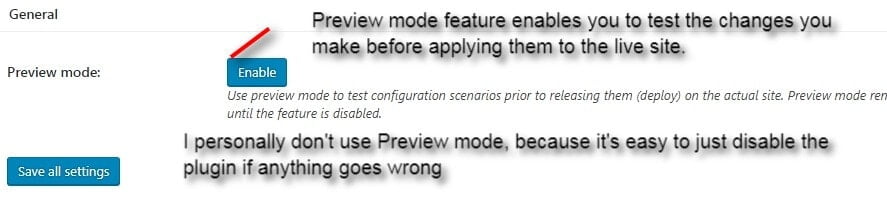
Preview Mode: In the general settings, there is a preview mode available. By clicking the enable option you can see the preview result of W3 total cache once all your settings are done. Once your site is working properly you can click the deploy option. Otherwise, make this as a disable option.
Follow the below screenshots and update the settings on W3 Total Cache plugin accordingly.
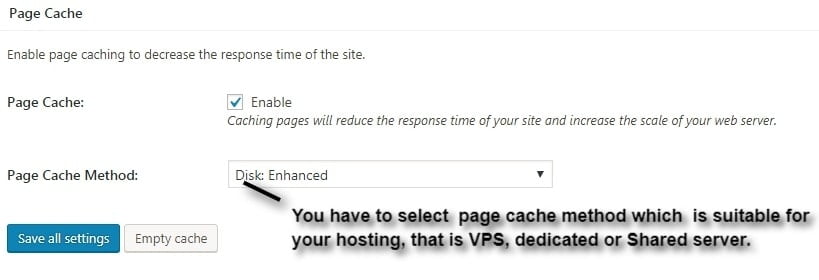
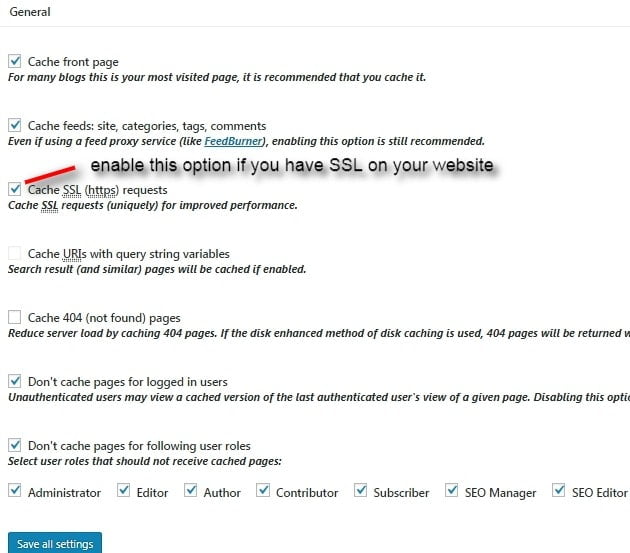
Page cache
Go to the Performance -> Page cache and page cache is the most important feature in the W3 Total Cache setup. When a visitor requests a page, the WordPress will create that page content and display it to you. When enabling the page cache, again when some other visitors or the same visitor requests that page, it will automatically display the page faster without loading to the server and querying the database. The importance of page cache is that it reduces the server load and loads the page much faster.
Minify: On general settings -> Minify
As the name indicates, minify is a method used to reduce the size of your website file. It mainly reduces the HTML, CSS and JavaScript files. By reducing this, the speed of your website will improve. It removes whitespace, comments, delimiters, newline character etc. The code and its functionality remain the same by minifying the size of your file. So by enabling the minify option, it decreases the loading time and improves the performance of your website. The following default minifies options to be enabled for speeding up your website.
- Minify: Enable(Not recommended if you are using CloudFlare)
- Minify Mode: Auto
- Minify Cache Method: Disk
- HTML Minifier: Minify
- JS Minifier: JSMin
- CSS Minifier: Minify

All these options will be a default, you just have enabled Minify option and move to the next option.
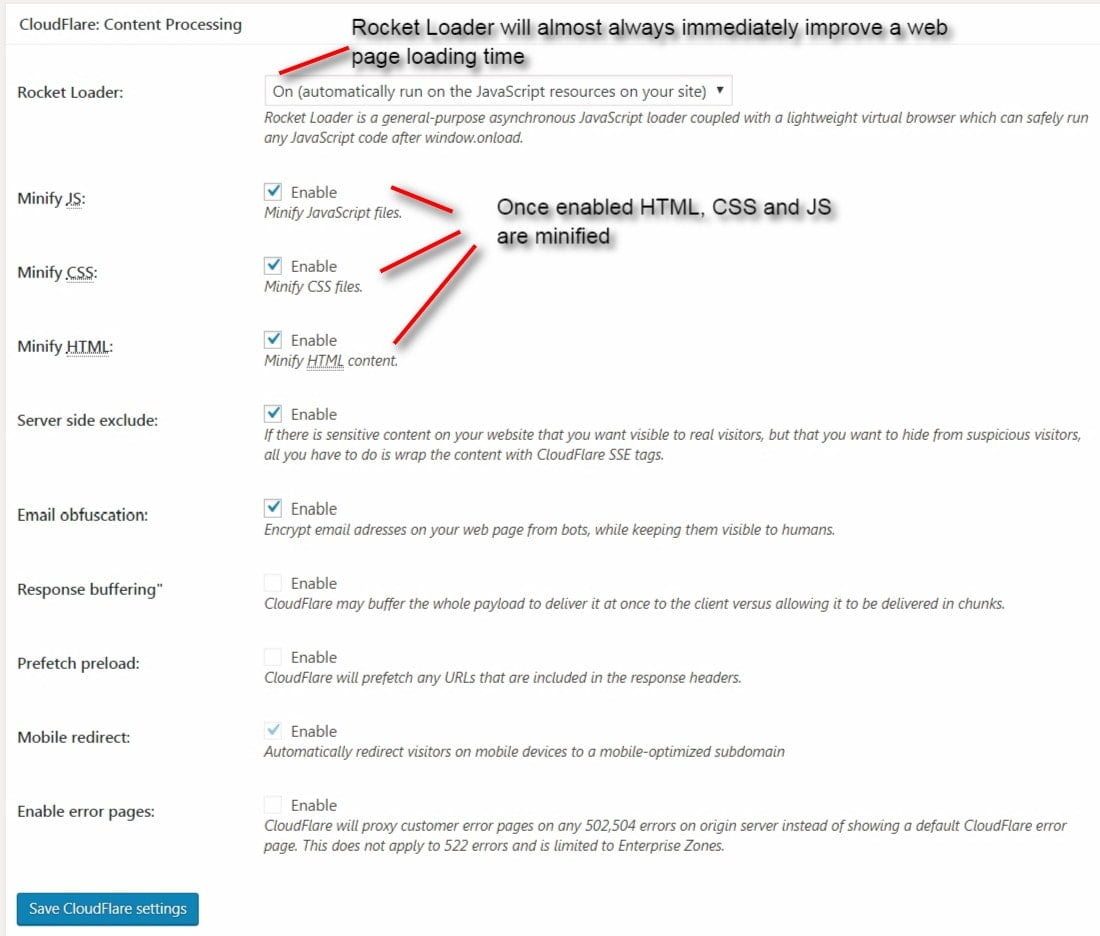
Note: If you are using W3 Total Cache with CloudFlare, then you have to disable the minify option because CloudFlare automatically minifies the website. Other than CloudFlare if you use any server enable it.
Related Post: How to SetUp CloudFlare?
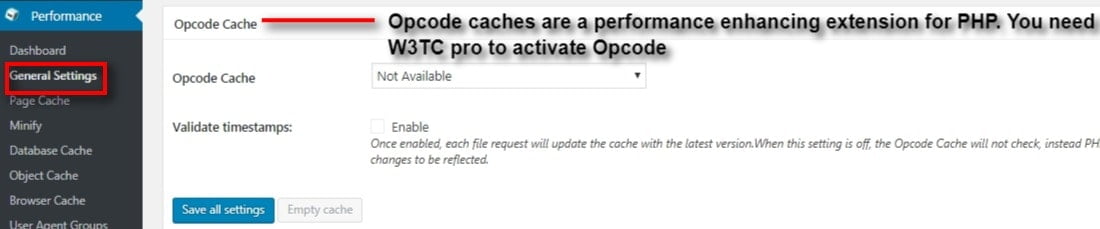
Opcode Cache
OpCode cache is for your PHP script. In a WordPress website, if a user makes a request, the PHP code has to read, parse, compile, execute and gives the output. But when you enable OpCode cache, the compiled PHP scripts are stored in the memory, so that it need not take the entire process to give the result. By enabling this, it saves a lot of time and displays the result quickly. But OpCode cache is available only in the premium version of W3 Total Cache.
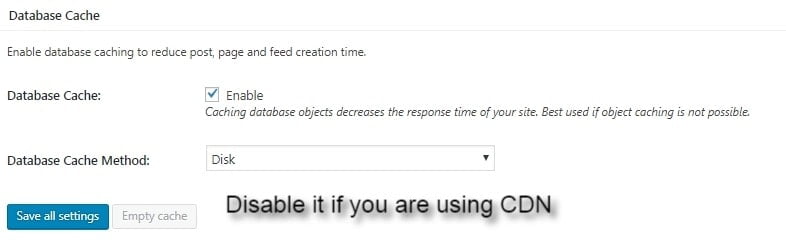
Database cache
The database is a location where all your data related to your website is stored. Without a database, none of your websites will work. So the database is like a heart for any website. When a data is requested from the visitor, the query will fetch the database and display the information. But again and again, if the same data is fetched, it takes the same time for every load wasting the time. So by using database cache, this query fetching time is reduced and as soon as the same data is requested, it displays the result quickly. With the help of this cache, you can reduce the time to display the page, posts etc and improves the performance of your site. But when your website is running on a shared server, then enabling this database cache will reduce the performance. If you are using dedicated server or VPS, the enabling database will be much beneficial. Please follow the Database cache in the general settings.
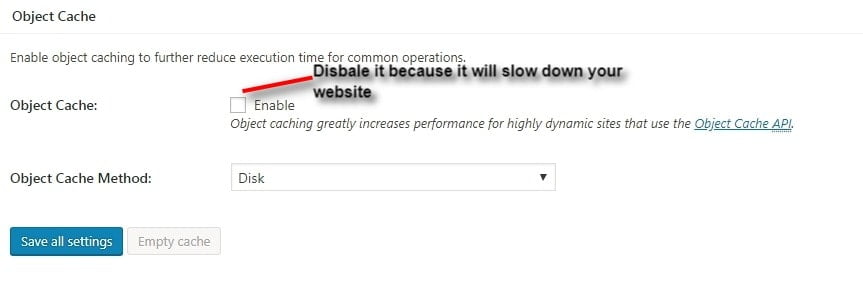
Object cache
The object cache is mainly used to save complex queries and store its result in memory. So instead of fetching the complex query every time, the result stored in the memory will display quickly and reduces your server loading time. But object cache lifetime is only for one request. If your website is running with a dedicated server or VPS, then object cache works well and increases your website performance whereas, if it’s on the shared server then it might slow down your website. Please follow the object cache in the general settings.
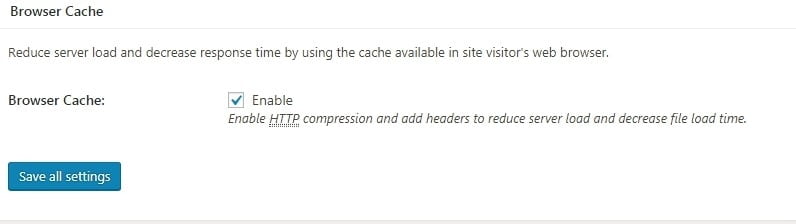
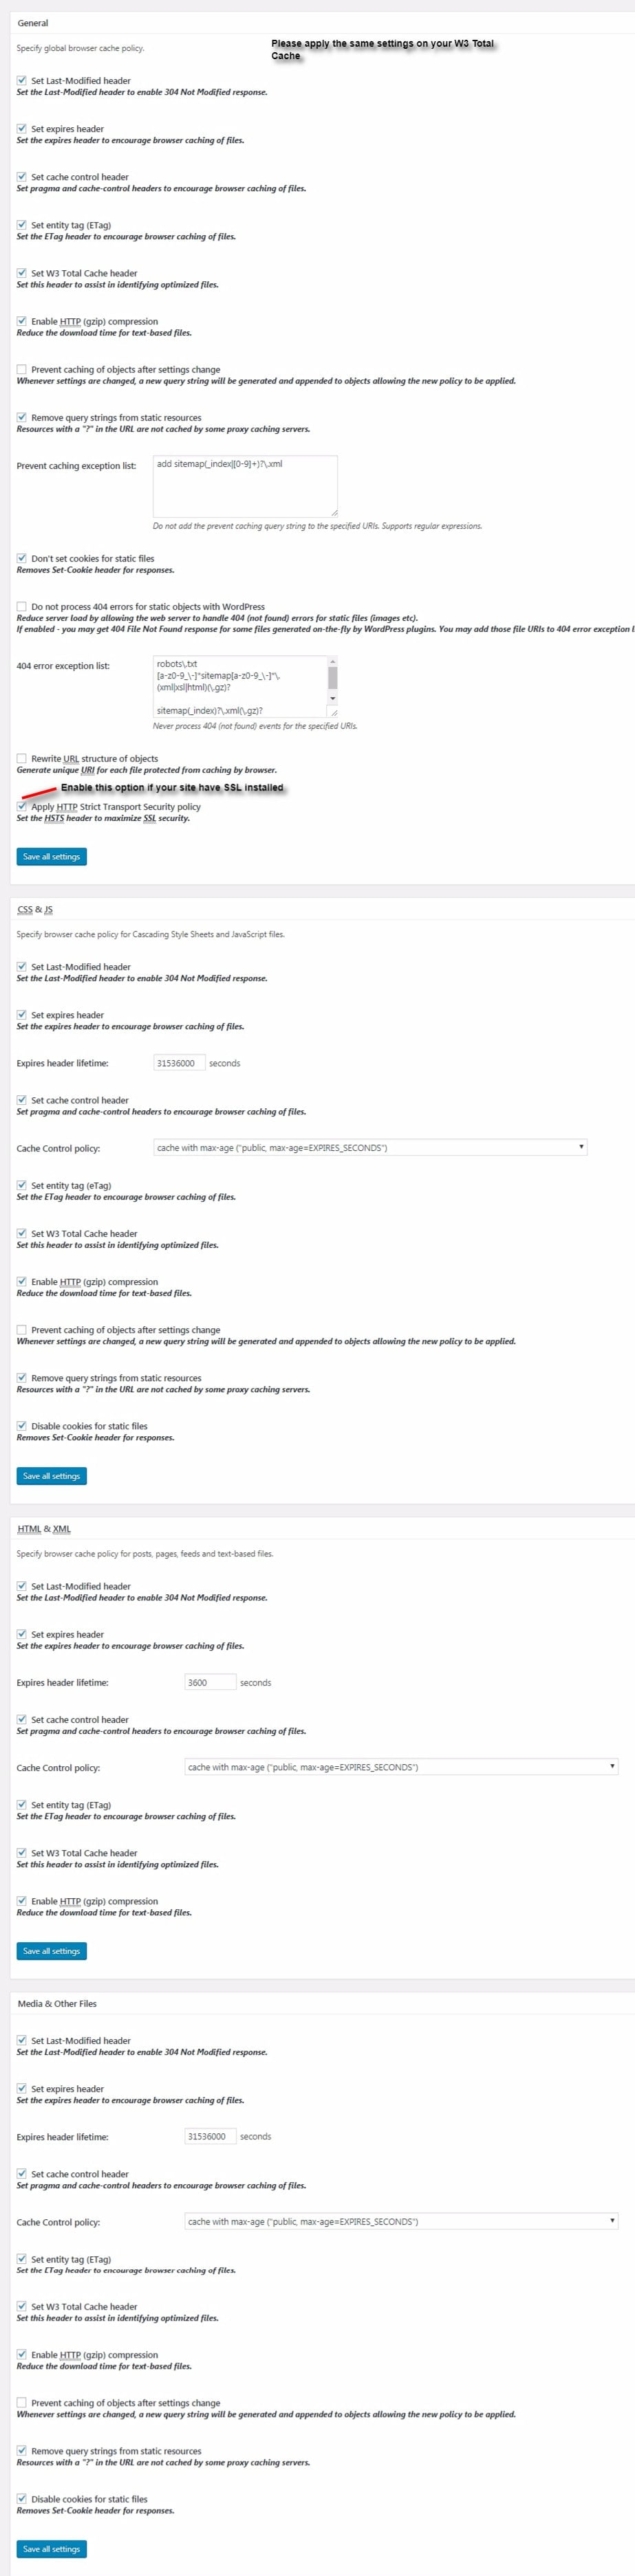
Browser Cache
Go to the Performance -> Browser Cache page and follow the settings by using the below screenshots. A website is a collection of files that intend to create web pages. In the website, there will be images, logo, JavaScript, CSS files etc. A browser cache is that it stores all these files locally in the user’s browser. That means if a user visits your websites first page, and if he moves to the second page, the time to load the second page will take much lesser time because all the static files such as images, logo are stored in the visitor’s browser by enabling browser cache. So that the user will get a good experience and speeds up your website loading time.
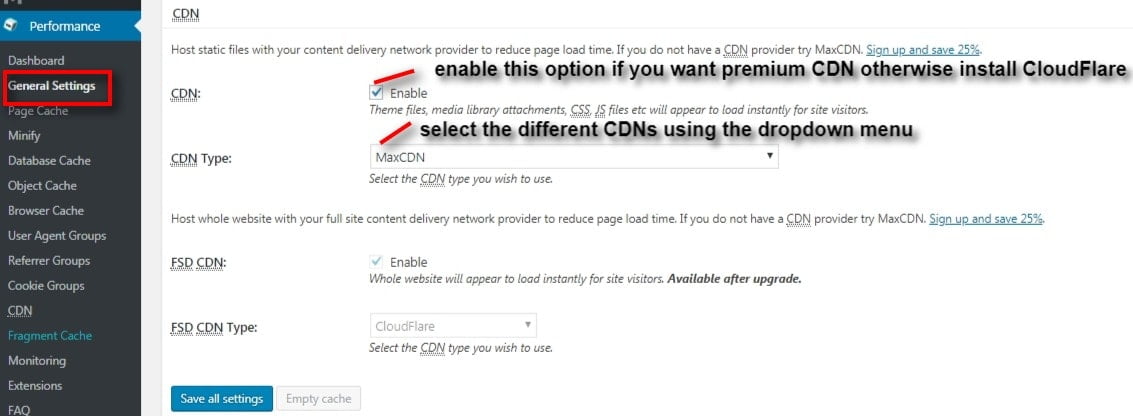
CDN
CDN stands for Content Delivery Network. CDN is generally a group of servers located all over the world.With the help of CDN, the page can be loaded fast. When a browser starts loading a static page, then the request is given to the server. But with CDN the request is given to the server which is geographically close to the server. So what happens is, the page is loaded fastly and gives you the requested page in much lesser time. CDN comes with many different services. The most common CDN services are MaxCDN and CloudFlare. Now enable the following options:
- CDN: Enable
- CDN Type: MaxCDN(you can select the CDN type as you wish)
- FSD CDN: Enable
- FSD CDN Type: (you can select the CDN type as you wish )
Once enabling the options click save and move to the next option
MaxCDN
MaxCDN is usually a Content Delivery Network. It is a service used to deliver the content of the website to the visitors who have to request it in the fastest way. The content of your website will be more protective. Its main intention is to speed up the website and reduce the server load. The user experience will also be great. MaxCDN is available only in premium.

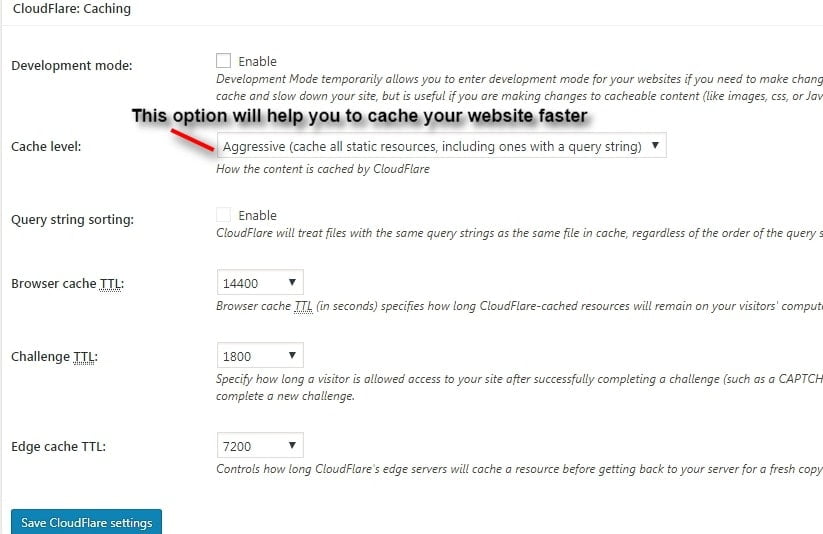
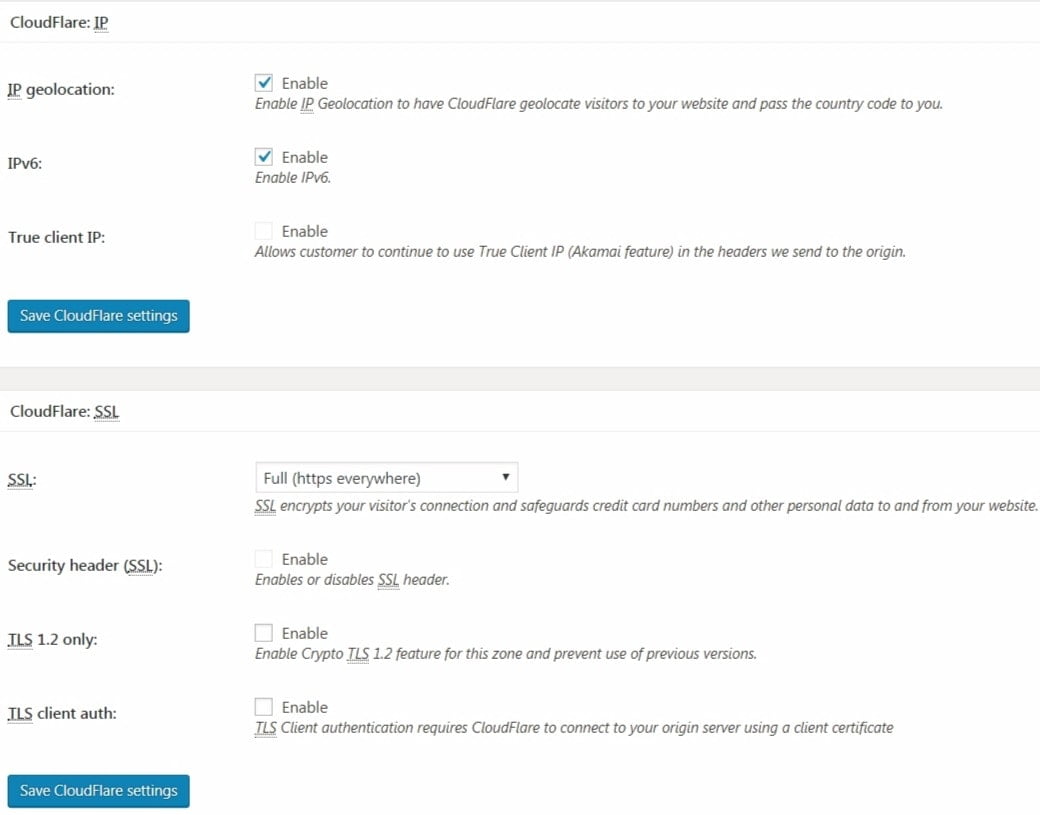
CloudFlare
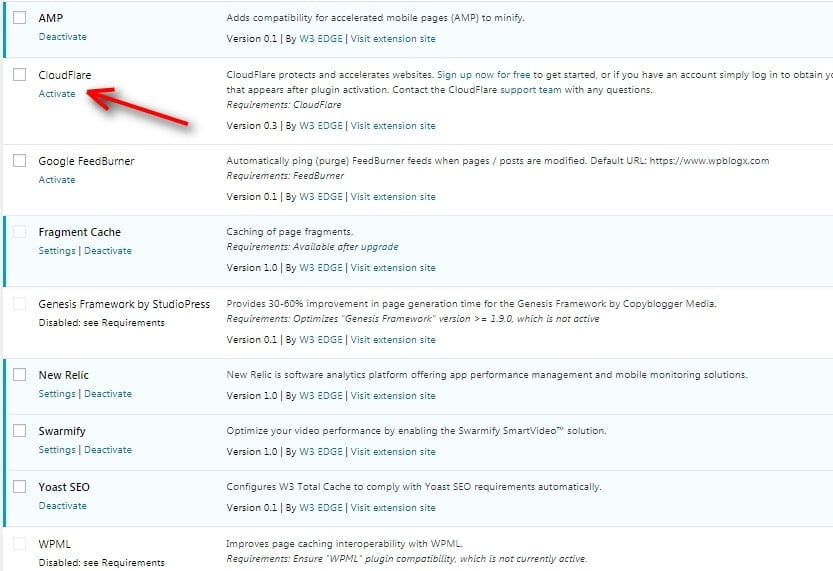
CloudFlare is also a Content Delivery Network. It is mainly used to increase the network performance and security of your website. CloudFlare caches the static content of your website and delivers the result in a much faster way. CloudFlare is available in premium as well as free version. Follow the below steps to activate the W3 Total Cache.
Performance -> Extensions -> click Cloudflare Activation button
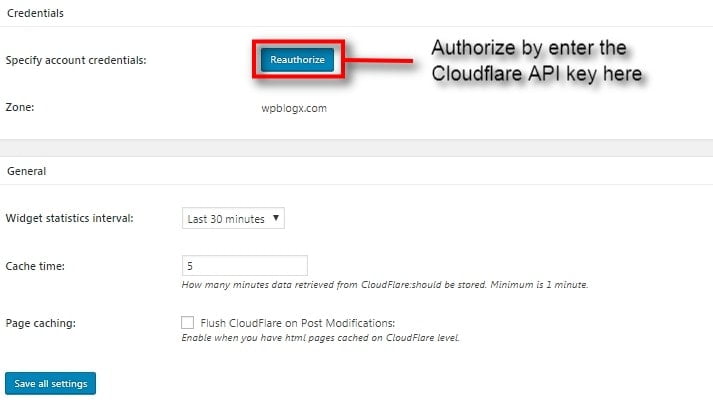
Click the Settings link

Enter your CloudFlare API here by clicking the Authorize button. I will show you in the next article, How to create an account and configure Cloudflare for your website?
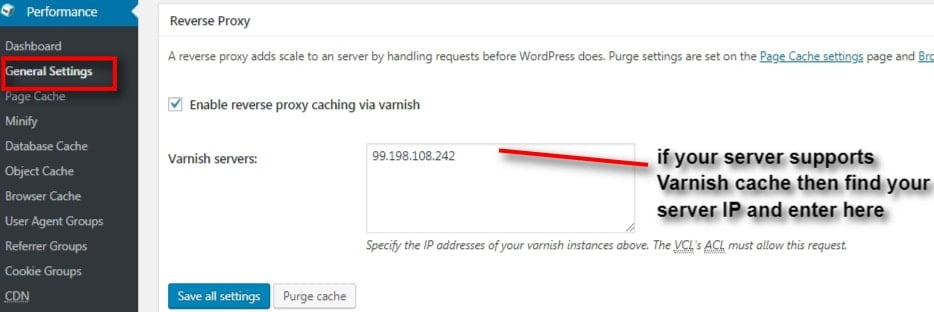
Reverse Proxy
Reverse Proxy is usually between tour website visitor and your server. When a visitor requests a page in your website, the server actually displays the result by fetching the database. If the visitor requests the same page once again, the result is cached in reverse proxy and it displays the result immediately without calling the server. By doing this, the loading time of a page is completely down. The most popular reverse proxies are Nginx and Varnish. But to be noted that the cache must be purged whenever there is a change in that page. Tick on the Enable checkbox and specify your IP address in order to enable reverse proxy.
- Enable reverse proxy caching via varnish
- Varnish servers: (Enter the IP address of the varnish server in the given box)
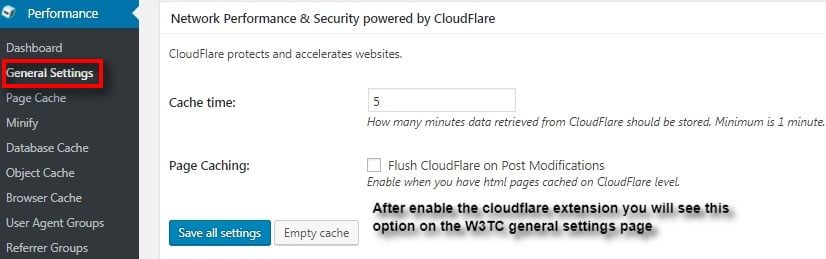
Network Performance & Security Powered by CloudFlare:
CloudFlare is basically a service which is used to improve your network performance and security. It is a CDN. You can use CloudFlare by creating an account in it. CloudFlare is great in protecting your website and for the performance.
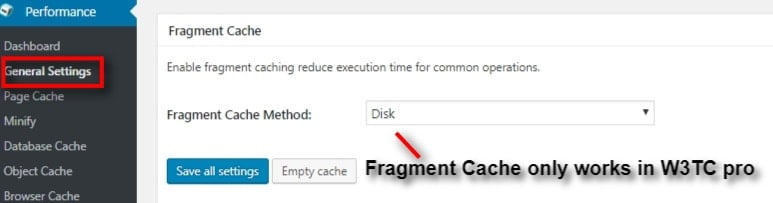
Fragment cache
Fragment cache is that it catches only a piece of the page and not the entire page. You can say a subset of a page. This cache is useful when you make complex queries to the database. The piece of code is stored in fragmented and whenever a request is made, the result is displayed from the cache. The best examples of fragment cache may be websites header, footer, navigation bars etc. By enabling this cache, it reduces the execution time. This cache is available on the W3 Total Cache Pro version.
- Fragment Cache Method: (select a method in the drop-down menu)
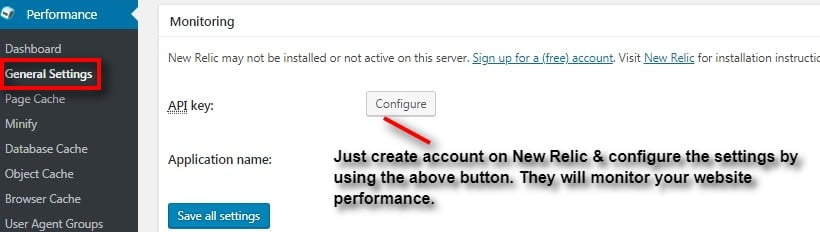
Monitoring
Monitoring your website is very important in order to know the status of your website depends on the number of visitors, server load, CPU load etc. You cannot sit 24/7 and look after your website. Instead of that, you can use the monitoring service to look after your website. There are many monitoring services available. But W3 total cache uses New Relic. So what you have to do is you just have to create an account in New Relic. This service will connect to your account by creating an account. Then by entering into this, you can get the details about your website performance and the server.
Licensing
If you require any additional configuration and support from the developers, then you have to purchase and verify your license key over here.
- License: verify license key

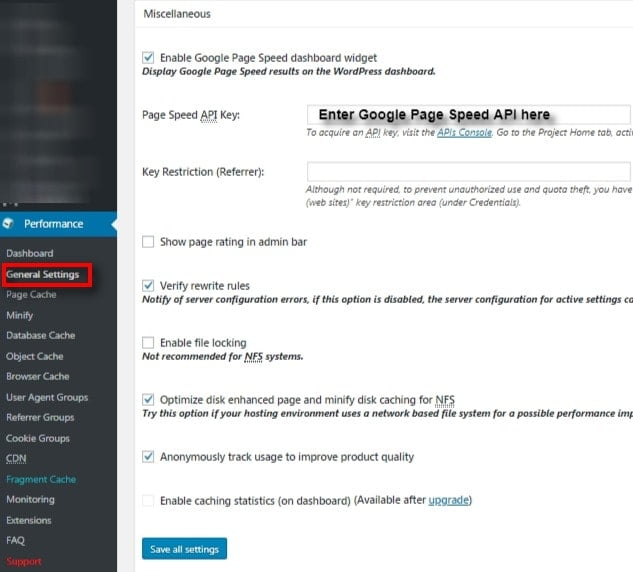
Miscellaneous
This section holds different types of option. With the help of this section, you can enable the Google page speed dashboard widget, edge mode etc. Keep the ‘verify rewrite rules’ as checked and all other options as unchecked. Enabling Google page speed is optional By enabling this you can check your speed manually.
- Enable Google page speed dashboard widget
- Pagespeed API key
- Key restrictions
- Show page rating in the admin bar
- Verify rewrite rules
- Enable file locking
- Optimize disk enhanced page and minify disk caching for NFS
- Anonymously track usage to improve product quality
Debug
This section is mainly used to troubleshoot the problem which is caused by the plugin. If you want to view the debug information, then view the source code of your website and move to the end of your page. There you will be able to see a comments stating you if the cache is enabled, how many queries were cached, and how long time it took to process the cached page.
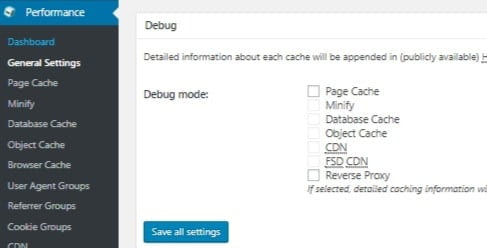
If you select this, a detailed report of your page will appear at the end of the page as an HTML comment.
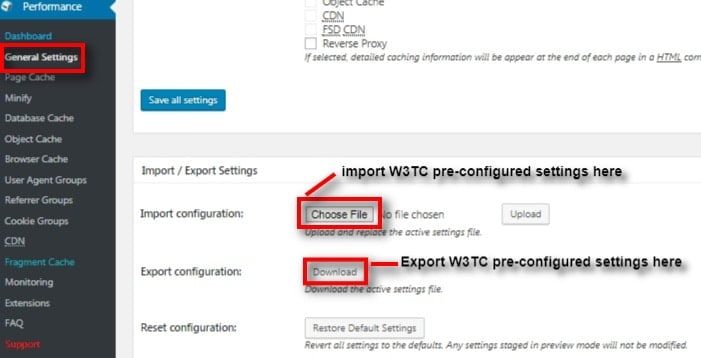
Import/Export Settings:
Import/ Export setting is possible in this plugin. It is consuming if you want to do all the configurations to your another website. Instead of that you can just export all your W3 Total cache settings and import it to your another website.
- Import configuration: Choose file and upload
- Export configuration: Download
- Reset configuration: Restore default settings
Final Thoughts
Caching is the most effective way to speed up the loading time of your website. To make your WordPress website load faster, W3 Total Cache plugin will be the best choice. But for the beginners to configure it will be quite tricky. But we hope this article would help everyone to know about it. Your comments are most welcome. Please feel free to share with us. You can subscribe us on Facebook and Twitter.
Hi Prabhu
I have gone through your article. As you said W3 Total cache is one of the best plugins for caching so far. Your article is very neat and points are apt to it. Keep updating posts like this.
Thanks for sharing. I tried to install W3 total cache showing Error not Available for you. How to fix it. Please help me
You writing is always fabulous. This is third time I’ve read your blog and I find the information very useful.
Above You have write that you can enabling the w3 total cache plugin setting if your website are hosted on shared hosting / vps or dedicated servers. As my site is running on dedication server but when i just follow your above one by one step then pruge all & checking receiving the error as once I enable the Database cache plugin receiving the error on domain page. Sir, Please Give me perfect solution.
I really like it whenever people come together and share opinions.
Great site, continue the good work!